
How to Use a Rolling Tray for Clean and Organised Rolls
Rolling trays make every sesh cleaner, faster and less wasteful. Whether you’re new to rolling or a seasoned smoker, setting up the right station takes the hassle out of the process.
Let’s walk through how to use a rolling tray in a simple, repeatable way so you can roll cleaner, stay organised, and waste less every time.
WHAT IS A ROLLING TRAY?
A rolling tray is a flat surface that keeps your gear in one place while you roll. Most trays have raised edges to stop herbs or papers from slipping off.
Some even include built-in compartments for tools and accessories. Without one, it’s easy to lose herb, make a mess or roll uneven joints.
WHY USE A ROLLING TRAY?
Using a tray reduces mess and helps you stay organised. It keeps everything within reach and gives you a repeatable setup that makes rolling joints smoother every time.
If you’re still wondering how the perfect rolling tray can improve your smoking experience, think about these quick wins:
- Less mess: Loose herb stays on the tray instead of your floor or lap.
- Reduced waste: Kief and shake collect neatly, not in the carpet.
- Better organisation: All tools have a spot, making each session more efficient.
- More consistent rolls: A steady setup helps you repeat the same method each time.
- Easier for beginners: With a clear space and order, rolling becomes much less intimidating.
ROLLING TRAY FEATURES THAT MAKE ROLLING EASIER
Rolling trays vary in shape and size, but the most helpful ones have design details that support a smoother workflow. Once you learn what to look for, the best rolling tray is easier to spot.
Watch for features that improve comfort and functionality:
- Raised edges: Stops herb and tools from falling off the tray.
- Rounded corners: Makes it easier to funnel shake into a paper or jar.
- Built-in compartments: Holds your grinder, lighter, and filter tips neatly.
- Grooves or tool wells: Keep smaller tools like scoops or pokers in place.
- Lid or cover: Protects your setup and makes storage or travel simpler.
WHAT SIZE ROLLING TRAY SHOULD YOU GET?
Getting the right rolling tray size depends on how and where you usually roll. Whether you’re rolling solo, in a group or on the go, there’s a size that suits your style.
Match your tray size to your smoking session:
- Small tray: Best for rolling on your lap or while travelling.
- Medium tray: Perfect for daily use with enough room for a grinder and papers.
- Large tray: Ideal for batching pre-rolls or sharing a sesh with mates.
WHICH ROLLING TRAY TYPE SUITS YOUR SETUP?
What your tray is made from affects how it feels to use and how easy it is to clean. Choose a tray material that fits your routine, whether you’re after durability or a clean wipe-down between uses.
Compare the options before locking in the right rolling tray:
- Metal rolling tray: Strong, light and hard to break. Easy to clean.
- Plastic rolling tray: Lightweight and affordable. May absorb some odours over time.
- Glass rolling tray: Smooth surface and easy to wipe. Can be fragile.
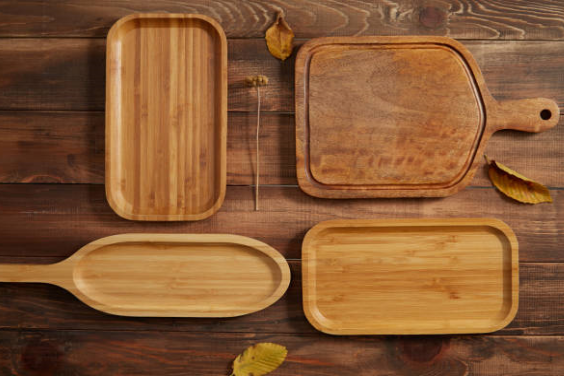
- Wooden rolling tray: Stylish but can hold residue and may be harder to clean.
At My Bong Shop, we stock a range of glass and metal rolling trays in different sizes to suit your rolling station. Both offer reliable performance and easy cleanup, which is ideal for everyday use.
HOW TO USE A ROLLING TRAY STEP-BY-STEP
A consistent rolling station leads to better results. Follow this simple, repeatable process to get clean rolls with less waste every time.
STEP 1: PREP YOUR SPACE
Pick a steady, flat surface like a desk or table. Wipe your tray before each session to keep things tidy and hygienic. Good lighting helps you see what you're doing.
STEP 2: LAY OUT TOOLS
Set out your gear in a line: grinder, herb, papers, filter tip, lighter. Keep a clean zone for rolling and a used zone for scraps. A quality rolling tray makes this layout easy to repeat.
STEP 3: GRIND OVER THE TRAY
Grind directly onto the tray to catch all your herbs. Aim for a texture that’s fluffy but not powdery. Avoid big chunks or fine dust as they affect the burn.
STEP 4: BUILD YOUR FILTER/CRUTCH
Roll a small filter tip using a simple fold or spiral. You can make it tighter if you prefer slower airflow. This sets the base for your roll.
STEP 5: PREP THE PAPER
Place the filter at one end of your paper. Shape the paper into a shallow trough that holds your herb evenly. Keep the glue strip dry and facing up.
STEP 6: FILL AND DISTRIBUTE EVENLY
Sprinkle herbs across the paper from end to end. Use your fingers or a small tool to spread it evenly and avoid clumps. Consistent filling helps with rolling and prevents canoeing.
STEP 7: SHAPE, TUCK, AND ROLL
Form the herb into a loose cylinder. Tuck the paper under the herb and roll up with steady pressure. Don’t press too hard or the draw may tighten.
STEP 8: SEAL AND FINISH
Lick the glue strip lightly and press down to seal. Run a finger along the seam to smooth it out, but avoid soaking it. Let it dry before packing.
STEP 9: PACK AND SET THE JOINT
Use a packing tool to gently tamp the end. Avoid using sharp or inked objects.
Test airflow with a soft draw. If it feels too tight, unroll and loosen slightly before resealing.
STEP 10: FINAL SWEEP
Use a corner of the tray to push leftover herb into a stash jar. Return tools to their spots. This quick reset keeps your rolling station clean and ready.
ARE YOU USING YOUR ROLLING TRAY THE WRONG WAY?
Even the best setups hit a snag now and then. Most rolling issues come down to one of a few simple mistakes.
Keep an eye out for these common problems and quick fixes:
- Runs or canoeing: Usually caused by uneven filling or loose rolling. Spread herbs evenly and roll with steady pressure.
- Tight draw: Often due to overpacking or a filter that’s too tight. Loosen the fill or adjust the crutch.
- Won’t seal: Could be too much moisture or overhandling. Use dry paper and touch the glue lightly.
- Mess everywhere: May be from using too small a tray or rolling on your lap. Try a larger tray on a flat surface.
ROLLING TRAY ADD-ONS WORTH PICKING UP
A few simple smoking accessories can improve your rolling process and cut down cleanup time. Try these additions to level up your tray setup:
• Mini brush: Sweeps up leftover herb and keeps the surface clear.
• Scoop tool: Helps fill papers without spilling.
• Storage jar: Keeps your herb fresh and within reach.
• Rolling machine or cone loader: Speeds up rolling and adds consistency.
• Magnetic lid: Protects your tray and lets you stash tools between sessions.
MORE WAYS TO USE A ROLLING TRAY
Rolling trays aren’t just for joints. They’re a versatile part of your kit, especially when you're keeping your sesh neat and efficient.
Put your tray to work in other ways:
- Use it to pack bowls for your bong without spilling herb.
- Load dry herb vapes cleanly using the flat surface.
- Keep tools, papers and grinders sorted between uses.
- Set it up as a travel station if you’re heading out.
TIME TO GET ROLLING
Using a rolling tray gives you a simple, repeatable process: prep, grind, fill evenly, roll, seal, pack, sweep. It keeps your space clean and your rolls consistent.
Whether you're just starting or looking to take your rolling experience to the next level, the right rolling tray makes every session easier. Pick a tray size and tray material that fits your routine, and build a setup that works every time.
While you're sorting your rolling station, check out our full range of high-quality tools, from jet lighters and rolling papers to ashtrays and other accessories that match your tray and your vibe. Everything you need for a smoother, more organised session is right here at My Bong Shop.