
How To Use A Weed Grinder For A Smooth Smoking Session
Every smooth smoking experience starts with preparation, and one of the simplest tools to use is a weed grinder. Instead of pulling apart dense buds by hand and ending up with uneven chunks, grinding breaks your herbs into smaller, even bits that pack well and burn evenly.
This beginner’s guide shows you how a grinder works, explains the role of each part, and highlights why high-quality grinders are worth adding to your setup. With these basics, you’ll get more reliable results from every session.
WHY USE A WEED GRINDER
You should use a weed grinder because it makes every step smoother. By breaking buds into even pieces, a grinder increases surface area, allowing airflow and heat to spread more evenly. That means your herbs burn at the same pace, making bowls easier to pack and joints easier to roll.
When it comes to grinders, the style you choose depends on how you like to smoke and how much convenience you want. A two-piece works well if you need something compact for quick grinding. A three-piece includes a chamber that collects the ground herb separately, making it easier to scoop and use.
With a four-piece grinder, you also get a mesh screen that sifts out kief, which you can save for later. For the most flexibility, a five-piece grinder has an extra screen and chamber that separate finer herbs from larger pieces, giving you more control over how you prepare each session.
HOW DOES A HERB GRINDER WORK?
A herb grinder works by using two halves lined with sharp teeth that twist in opposite directions. As you turn, the teeth cut through the buds and break them into smaller pieces. This even texture improves airflow and gives you herbs that burn more consistently.
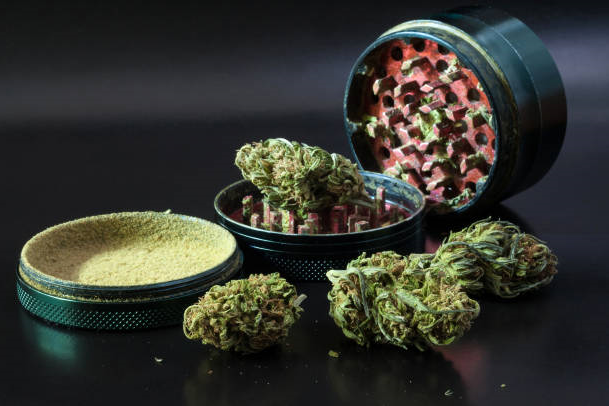
WHAT ARE THE PARTS OF A WEED GRINDER?
Understanding the main parts of a grinder helps you achieve a more consistent grind with every twist. While all grinders share the same purpose, their designs can vary.
Some options are basic with just two sections, while others include extra chambers to separate each stage of the grind. Here are the key parts you should know:
- Lid: The top section usually includes the grinder’s teeth that line up with the ones in the chamber, slicing herbs as you twist.
- Grinding chamber: This is where the herbs break down into smaller pieces, creating a more even texture.
- Collection chamber: This section gathers the ground herb, keeping it separate from the teeth so it’s ready to pack or store.
- Bottom chamber: Found in four-piece and five-piece grinders, this part uses a fine screen to catch extra-fine particles for later use.
- Magnetic closure: Many grinders include a magnetic closure that keeps the lid secure while you twist, reducing spills and making the grinding process smoother.
PLASTIC WEED GRINDER VS. METAL WEED GRINDER
The difference between plastic and metal weed grinders comes down to durability, cost, and the quality of the grind. If you prefer a light, budget-friendly, and easy-to-carry option, plastic weed grinders are a practical choice. They work well for casual use, though the grinding teeth may wear down faster with regular sessions.
Metal weed grinders, especially aluminium or stainless steel designs, deliver a smoother, more even grind. They cost more upfront but last longer, which makes them a better choice if you use a grinder regularly.
To decide between the two, think about how frequently you use your grinder and whether portability or long-term performance matters more to you. Choose plastic for an affordable, lightweight option, and metal for a grinder that feels solid and gives consistent results.
HOW TO PROPERLY USE A WEED GRINDER
Using a grinder is straightforward once you follow a clear step-by-step guide. Each stage helps break herbs down evenly and prepares them for rolling, packing, or keeping in your stash.
Follow these easy steps:
Prepare the herbs
Break your herbs into small pieces first so the sharp teeth can grip evenly.
Remove the lid
Take the lid back to expose the sharp teeth, then place the pieces around the edges of the chamber, avoiding the centre where the magnet sits.
Grind the herbs
Put the lid back on, press lightly, and twist it back and forth. The initial resistance means the teeth are cutting, and it eases as the herbs break apart.
Tap and check
Tap the grinder gently on a table or rolling tray to let stuck pieces fall through, then open it to check the texture. Grind longer if you want it finer.
Collect the ground herb
If your grinder has a bottom chamber, unscrew it to access the ground herb, which is now ready to roll, pack, or store.
HOW LONG SHOULD YOU GRIND WEED FOR?
The time it takes to grind depends on the sharpness of your grinder’s teeth and the density of your herbs. Instead of counting seconds, focus on how the grinder feels as you twist. You should notice resistance at first, then a smoother turn as the herbs break down.
Grinding too little leaves leaves large chunks that burn unevenly, while grinding too much creates a powdery mix that can affect airflow. Aim for a texture that looks even, feels slightly dry, and packs well into your cone or water bong bowl.
For rolling, a finer grind helps create a tighter cone or rolling paper, while for bowls, a slightly coarser mix keeps the airflow stronger. Over time, you’ll recognise the right point for your grinder and your setup.
HOW TO CLEAN A WEED GRINDER
A grinder works best when it’s kept clean. Over time, sticky buildup can make twisting harder, clog the screen, and reduce the quality of the grind. Regular cleaning keeps the grinder sharp and ready for every session.
To clean your grinder properly, follow this clear step-by-step process:
Disassemble the grinder
Take apart the lid, grinding chamber, collection chamber, and bottom section so you can reach every surface.
Brush off residue
Use a small brush or toothbrush to remove herbs and resin stuck between the grinder’s teeth and screen.
Soak for a deeper clean
Place the pieces in a specialised cleaning solution designed for grinders and glassware, and leave them to soak long enough to loosen stubborn buildup.
Scrub and rinse
After soaking, scrub the teeth, screen, and edges with your brush to clear out any remaining debris, then rinse each part thoroughly with warm water.
Dry and reassemble
Let every piece dry completely before reassembling. Any moisture left inside can lead to clogging and affect performance when grinding for your stash or packing a bong.
SHOP HIGH-QUALITY GRINDERS TODAY
Grinding your herbs the right way makes every session smoother and more consistent. A high-quality grinder saves you time, improves airflow, and helps you get the most out of your stash.
With different types to choose from, including plastic grinders for convenience and metal grinders for lasting performance, you’ll find one that suits your style. Shop the range of high-quality grinders at My Bong Shop today and get the best out of every session.